How to Install a Language in WordPress
WordPress gives an easy way to install any supported language.
Background
WordPress displays in U.S. English by default, but it supports other languages. The current list of supported languages is large and growing.
Installing a language in WordPress means placing translation files for the language in the folder wp-content/languages. This way, WordPress knows how to map each U.S. English string embedded in the source code to an equivalent string in the target language.
Steps
You can place translation files manually in the languages folder, but the easiest and safest procedure to install a language in WordPress is the one described below.
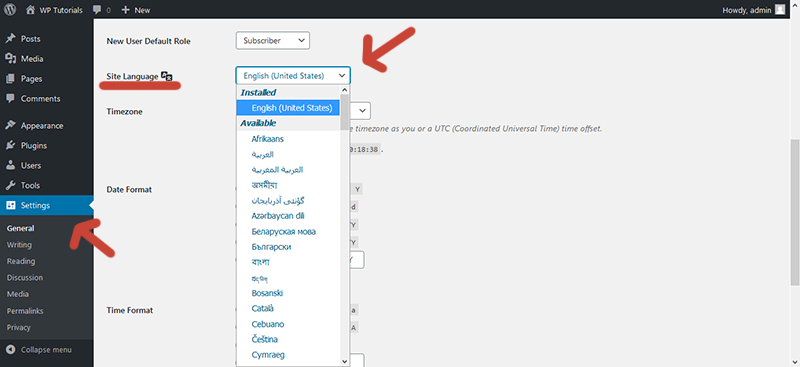
Step 1: Navigate to Settings > General.
Step 2: Choose the desired language in the Site Language dropdown.
Step 3: Click the Save Changes button located at the bottom of the screen. Behind the scenes, translation files are being copied from the WordPress Language Repository to the languages folder.
Step 4: Check that the chosen language is now listed under Installed in the dropdown.
Step 5: Repeat the steps 2–3, but this time set the site language to the value it was before applying the procedure.
Further reading
I recommend the other tutorials in this series to learn more about languages in WordPress.
- How to Install a Language in WordPress
- How to Change the Site Language in WordPress
Comments