How to Register a Custom Post Type Using a Plugin in WordPress
Post types are a way to refer to each type of content on a WordPress website.
Background
WordPress comes by default with post types like Post, Page, and Attachment; and provides the function register_post_type
to create other post types. This function is easy to use, but the process is even easier using a post type registration plugin.
Custom Post Type UI
Custom Post Type UI is a leader plugin for post type registration in WordPress.
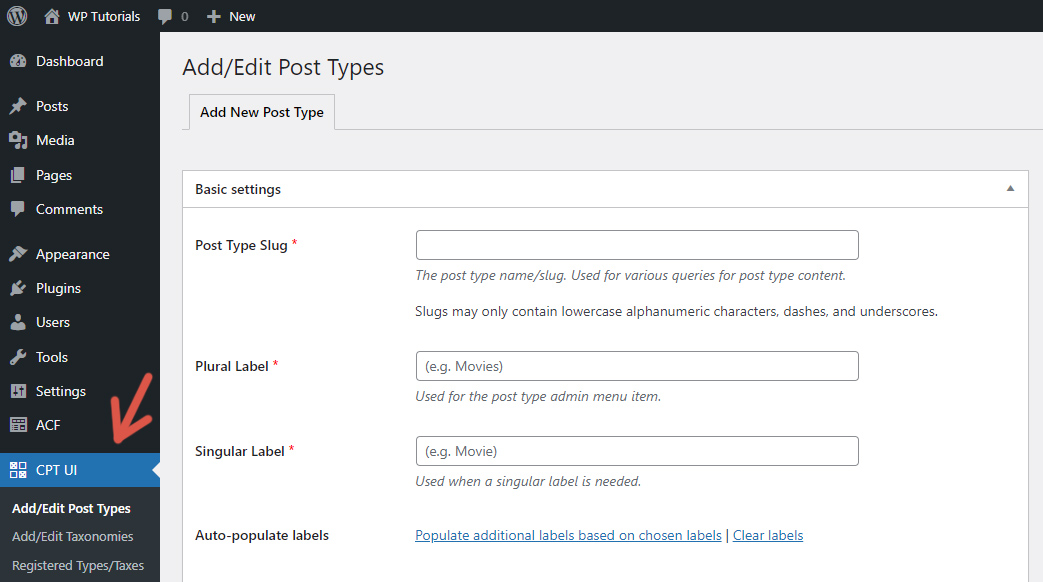
Step 1: Install and activate the plugin Custom Post Type UI.
Step 2: Navigate to CPT UI > Add/Edit Post Types, enter the parameters of the new post type, and click the Add Post Type button.
Advanced Custom Fields
Advanced Custom Fields is a leader plugin in the WordPress ecosystem. It was originally thought for custom fields, but later added support for custom post types and custom taxonomies.
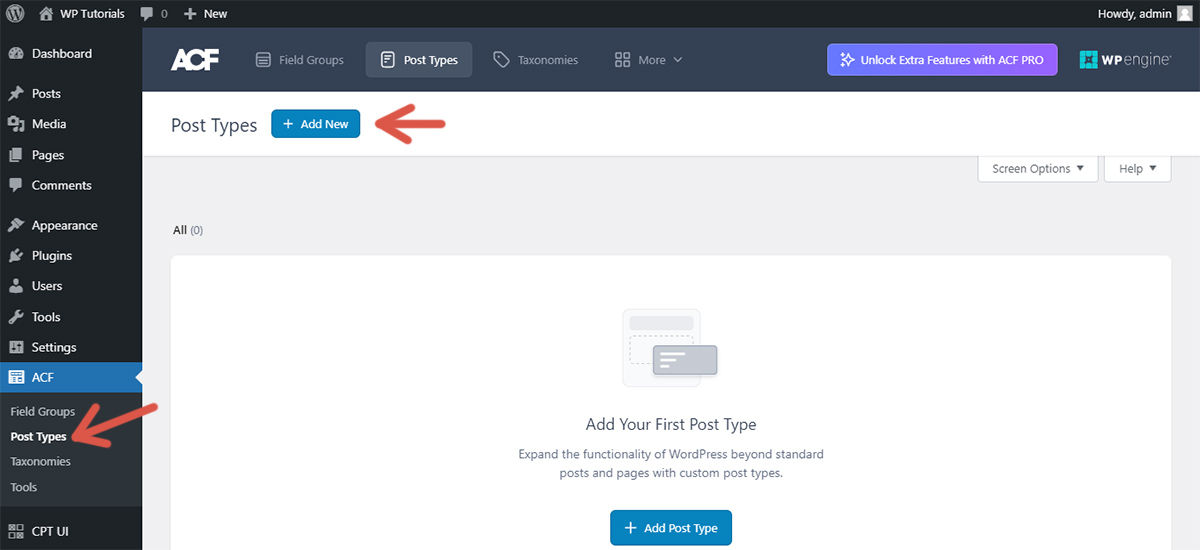
Step 1: Install and activate the plugin Advanced Custom Fields.
Step 2: Navigate to ACF > Post Types and click Add New.
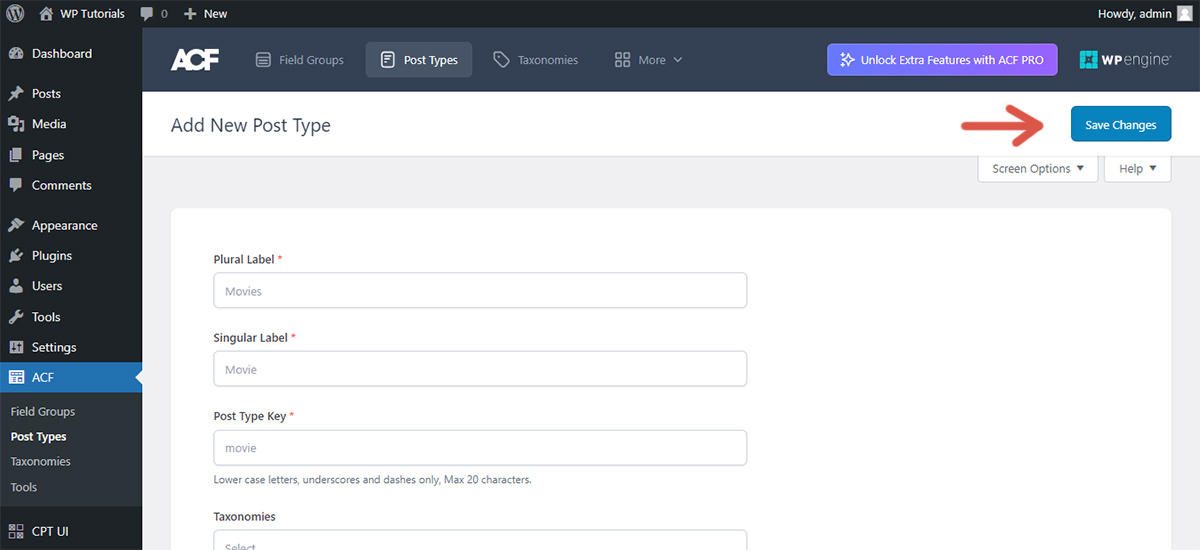
Step 3: Enter the parameters of the new post type and click the Save Changes button.
Attributes
The list of attributes of a post type is large. You can find a detailed explanation of each one in the PHPDoc of the function register_post_type and in the official documentation.
Keep in mind that the identifier of a post type:
- Must not exceed 20 characters
- Should be prefixed to avoid conflicts
- Should only contain lowercase alphanumeric characters, underscores, and dashes
Further reading
I recommend the other tutorials in this series to learn more about post types in WordPress.
- Post Types in WordPress
- How to Register a Custom Post Type in WordPress
- How to Register a Custom Post Type Using a Plugin in WordPress
- How to Unregister a Custom Post Type in WordPress
- How to Modify a Post Type in WordPress
- How to Change the Slug of a Post Type in WordPress
- How to Check if a Post Type Exists in WordPress
- How to Get the Registered Post Types in WordPress
- How to Get the Attributes of a Post Type in WordPress
- How to Get the URL of a Post Type Archive in WordPress
- How to Add Custom Post Types to the Main Query in WordPress
Comments